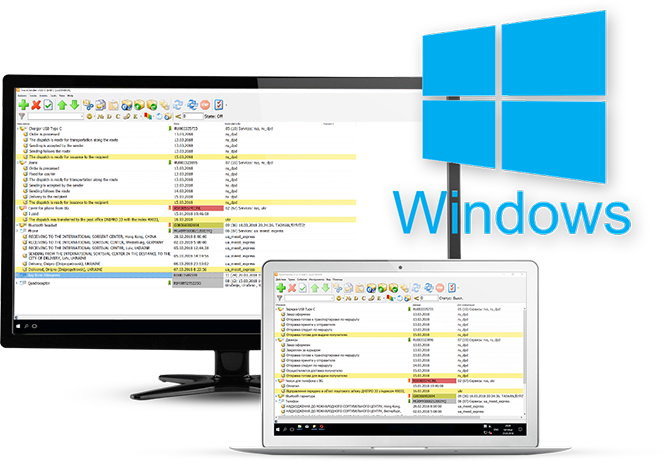
TrackChecker is a program for tracking any parcels and shipments.
The Application supports 1300+ post services, international courier services and popular e-commerce carriers. It automatically defines carriers by tracks, but there is also a mode of manual selection of postal services.
The application has many convenient functions:
- managing the list of tracks: groupings, tags and filters
- multilingual interface
- the days counter "in transit"
- the days counter before the end of the order protection
- translation of information about parcels
- setting track update frequency
- customize appearance
- backup
- etc.
Using terms
| Group | logical element, similar to the folder in terms of the file system. Can contain other groups and tracks. |
| Track | the unique number of the parcel, which is used to track it on the sites of postal / courier services. And also a logical element describing a particular parcel with a specific track number. |
| Event | record of the parcel movement, received from the post service or created manually. |
| Service | set of properties of the postal service site from which the program receives information about the track number. |
| SID | Service ID, a unique identification of the service used in the program. |
| LMB, RMB | left mouse button, right mouse button |
App main window
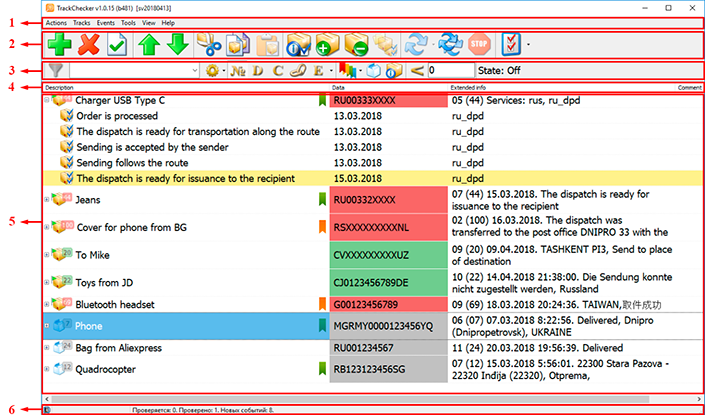
- Main menu
- Main toolbar
- Filter toolbar
- Header of tracks table (tree)
- tracks tree
- Status bar
Adding new track
To add a new track, select the group (track will be added into selected group), or the track (track will be added next to selected track), or select nothing - the track will be added to the "root" of the list.
Press the "Ins" hot key, or select "Add track" from the toolbar or context menu.
By default (Options -> Tracks and events -> Next track Wizard), you will see the Wizard, with "Back" and "Next" buttons.
Fill the fields on the first page. Any field can be blank.
Button with the green arrow, in the track input field, allows you to bring the track into a standard view - convert the track symbols to uppercase and remove extra characters (for example, the entered track rr123 456 789Cn will be turned into RR12345678CN).
The "Delivered" option can mark the track as delivered, if it is not get status "Delivered" automatically.
The "Ignore delivered" option has opposite effect of previous option. Use it in when track gets status "Delivered" automatically (rules of finalizing worked on track), but you still need to update it.
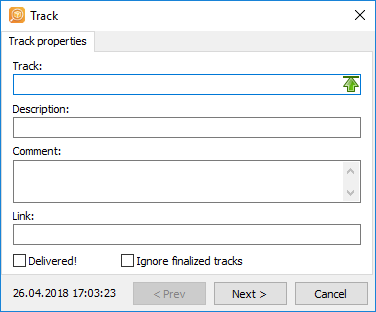
Press "Next" to proceed (Alt+Ctrl+Left) on next window - "Services"
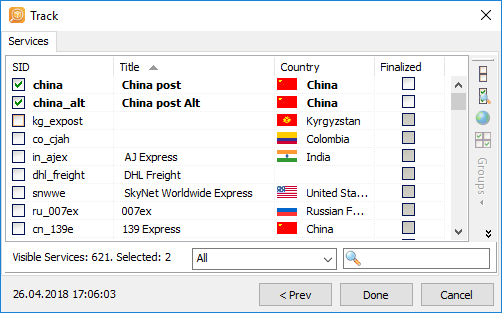
App will automatically select post services according to your track. But if there are now right services in the list, you can click the "All" button to display a list of all services available in the program and add right service manually.
Also, if the groups of services were specified in the settings, the drop-down menu of "Groups" will be available for quick select the required services.
Note that the tracking service(s) for the recipient's country need to be selected manually, or you can add the necessary services to the default services list in the program settings. Example: for the track number RA123456789CN, the program will automatically select the China post service, the service Russian post (if the recipient is in Russia), must be selected manually (if this service was not selected as the default service in the program settings).
In all lists of services, a quick filter is available for the names and identifiers (SID) of the services - to activate it, just type a few letters from the name or SID of the service.
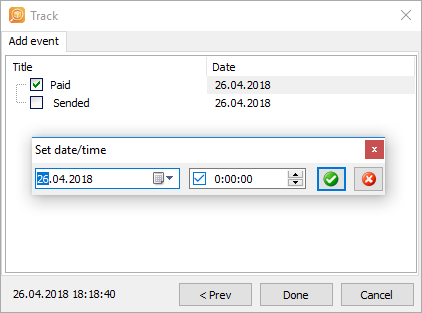
Selecting custom events
If the option "Add events to the new track" is selected in the settings, the third page "Add events" will be available in the Wizard. It is possible to select events that will be automatically added to the new track. The date of the event can be changed by pressing F2 or by double click.
For the correct counting of days from the moment of payment, you should add an custom event with a payment date.
Checking tracks

After adding tracks, it's recommended to set the program settings according to your own preferences (for example: set the track checking period, update (check) the track after adding, etc.).
After checking tracks on post services, new events for tracks may appear, in that case event, the track, and the group containing the track are marked by italic bold fontstyle (by default, of course you can set the font parameters in the settings).
Also, when a new event is received, the track icon is expanded with an icon with letter i in a circle, and the icon in the notification area (tray) starts flashing, displaying the number of new events.
The "Extended info" column displays the following data:
- when track uncollapsed: "number of track events" ("days counter") Services: "SID of using post services"
- when track collapsed: "number of track events" ("days counter") "Last track event"
To mark an event (track/group events) as readed (that removes all marks of a new events), just select the element and press the Spacebar, or click the "Mark all as read" button on the toolbar:
